Final Cut: Using a PNG sequence for transparency effect
How do you immerse an object, say, an animated iPhone, in rich detailed smoke using Final Cut Pro?
What we're making
Well, you can go ahead and set up your studio and smoke machines, and spend a few weeks. Here's a video on Youtube on how to do that. You'll need special flashes, smoke sticks, backdrops, and so on, so you may need to go shopping first.
Wouldn't it be cool if there was a way to do it right now, without a studio, and on your own computer?
Let's do that! We'll use a single smoke video and then layer it over and under your object.
First, you'll need to export a PNG sequence with your object. You can do that in most 3D apps. If you're using Rotato, you can do that too, but you can also export a real video with a transparent background and skip the PNG sequence step.
Import the PNG sequence into Final Cut
- Select all PNGs and drag them into the Media area in Final Cut
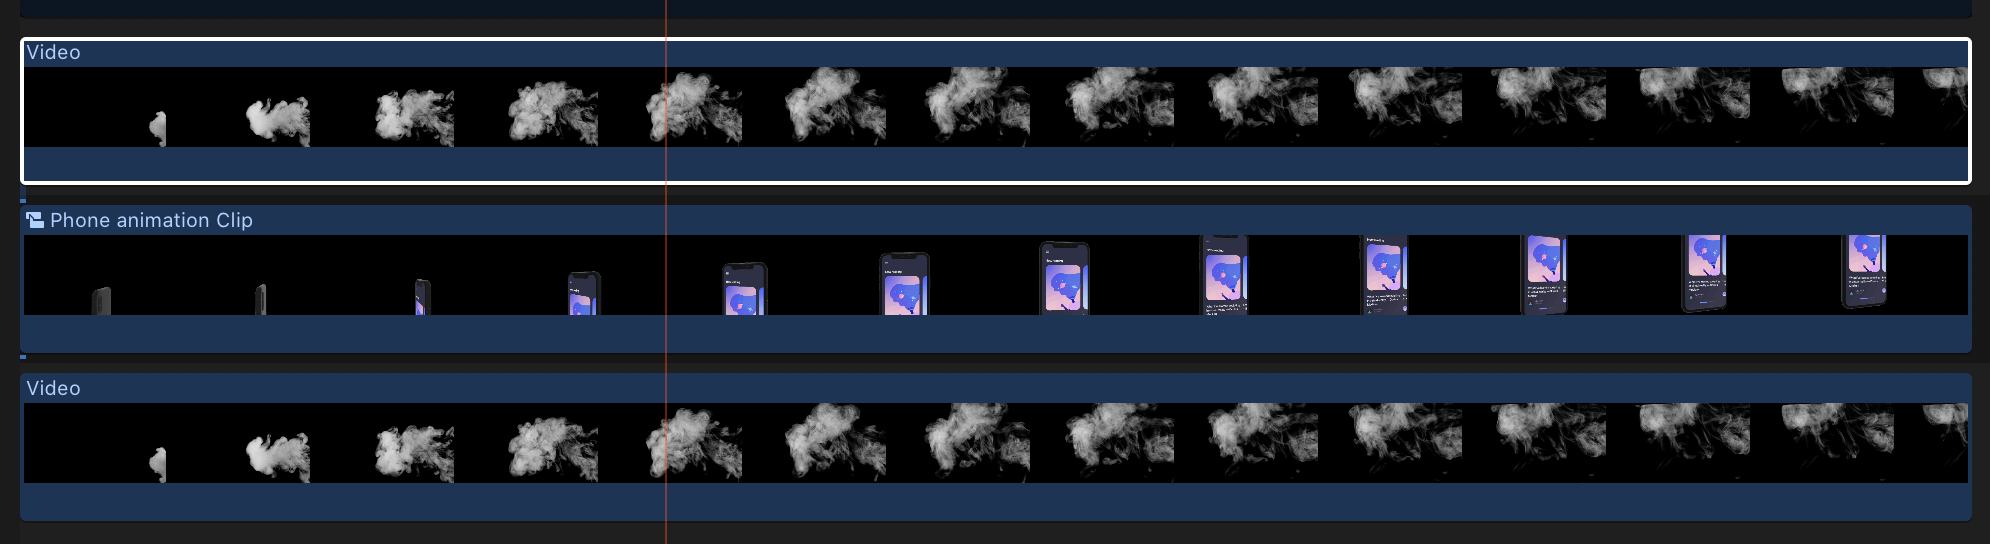
- Select all clips there and drag them down below onto the timeline
- When Final Cut asks, choose 60 fps, and the resolution you chose in Rotato (ie. 1080p)
- With all clips selected, go to Modify > Change duration
- Press the 1 key on your keyboard. You'll see the duration now changes to 1, and all the clips now gather at the left end of your timeline
- Go to File > New > Compound Clip
And that's it. You now have a transparent clip in your timeline! You can drag in another video track below the Rotato clip - and, of course, above it.
Bonus step: Use a video without an alpha channel as the foreground video
But wait, this still doesn't look quite like the video above, now does it? We still need the foreground smoke.
You saw how we added the smoke video to the background and had the phone mockup appear on top of it. Now let's also add the smoke video to the foreground!
Just one problem.
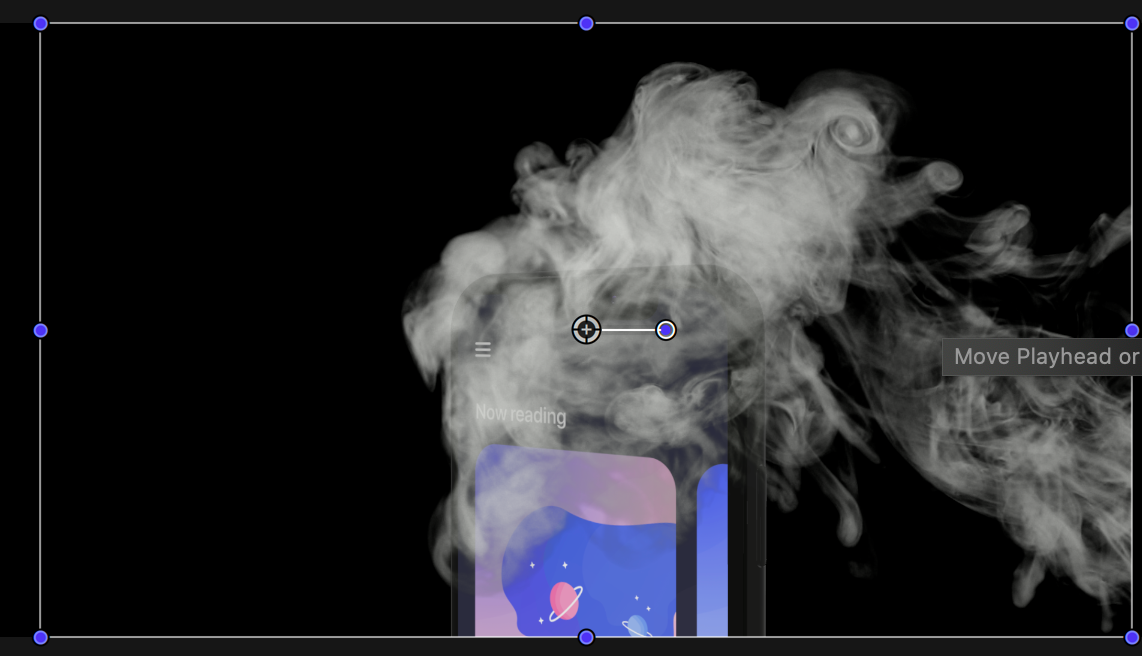
The smoke video has a black background. Simply duplicating its timeline track and dragging it up above the phone mockup track won't work. We also want the foreground smoke to enter the video from the opposite side of the screen. Let's get to work.
Make a copy of the smoke clip
- Copy and paste the smoke video
- Drag the copy above the phone mockup
Your timeline now looks something like this
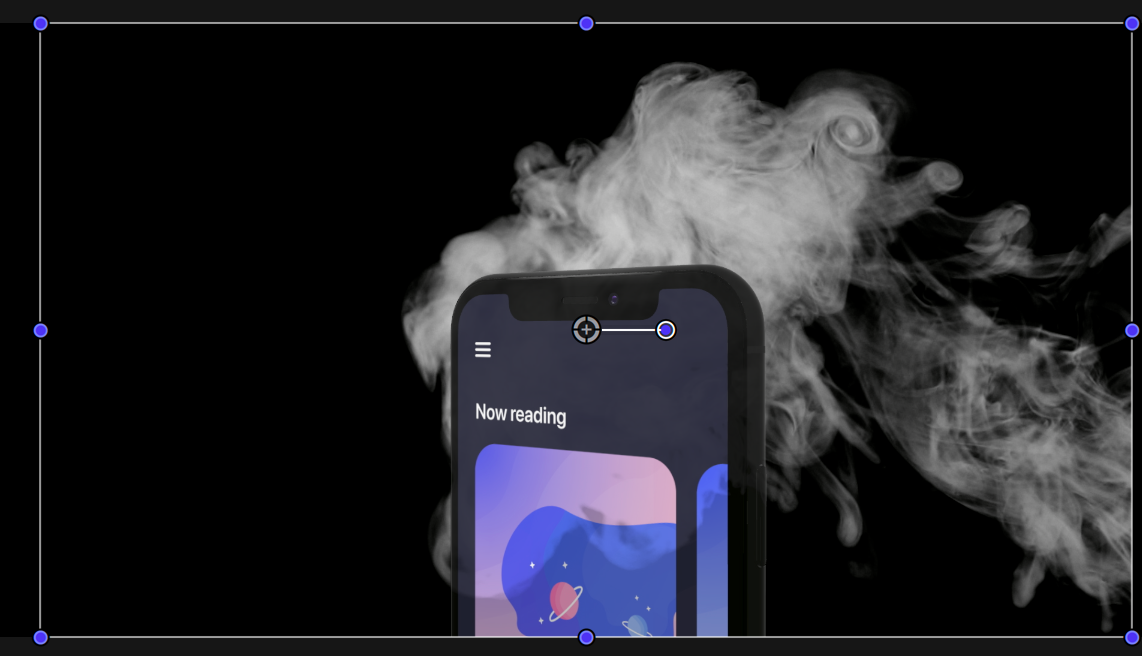
If you play the video now, you'll notice that you can no longer see the phone mockup! Let's sort that out.
Key out the background
In Effects(⌘5), find Keying, and drag a Keyer onto the new smoke clip.
That's better. We can now see the phone again. But it's a little too visible if you ask me.
In the Video Inspector, you should now see the properties for your keyer
Click the Invert checkbox.
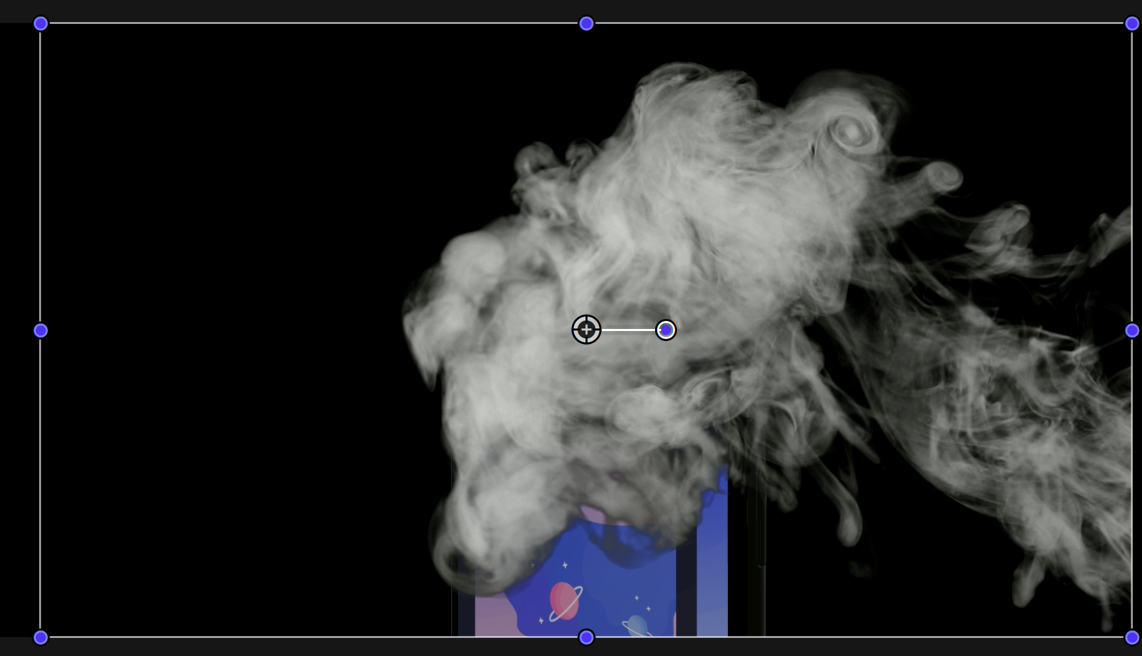
Still not perfect. There are a lot of black smoke particles we don't want there.
There are tons of ways you can refine it and make it look great. One example is in Color Selection, select Manual Color, and then drag the left-hand slider knob towards the white area to filter out some of the black smoke particles.
Much better. But it's kind of hard to see the background smoke. Let's do something about that.
Flip the smoke clip
We wanted the smoke to come from the other side of the screen, remember? Let's get to it.
- Find the Transform section of the Video Inspector
- In Scale X, it currently says 100%. Put a minus in front of it, so it says -100%
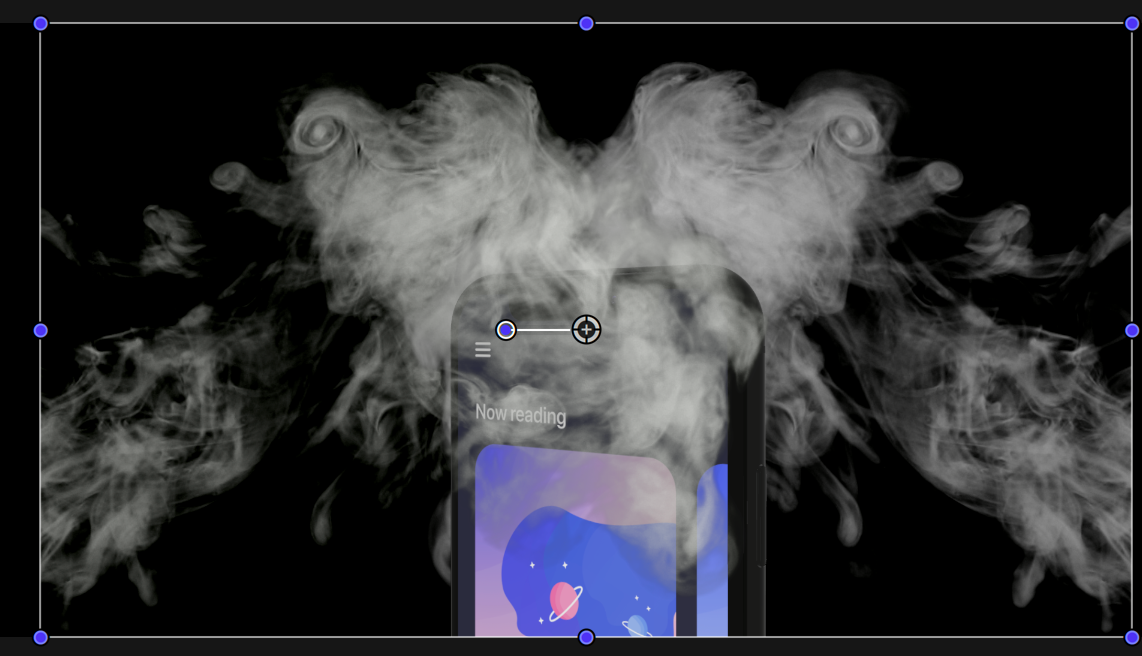
The video has been flipped. Now hit Space and enjoy your work! Keep tweaking the Keyer until you get the results you like.